

Why Install Artificial Turf Over Concrete?
Benefits for Low-Maintenance Outdoor Spaces
Artificial turf offers a simple way to refresh tired concrete areas without the constant upkeep of real grass. Once installed, there is no need for mowing, watering, or fertilising, making it ideal for those who want an attractive outdoor space without dedicating hours each week to maintenance. The surface stays green year-round and is unaffected by weather, ensuring a consistently tidy appearance in all seasons.
The durability of modern turf also means fewer replacements or repairs. Unlike natural grass, it does not patch or fade in high-sun areas, and pets cannot dig it up. This makes it a practical choice for homes, schools, and commercial spaces that want long-lasting results with minimal intervention.
Transforming Patios, Balconies, and Pool Areas
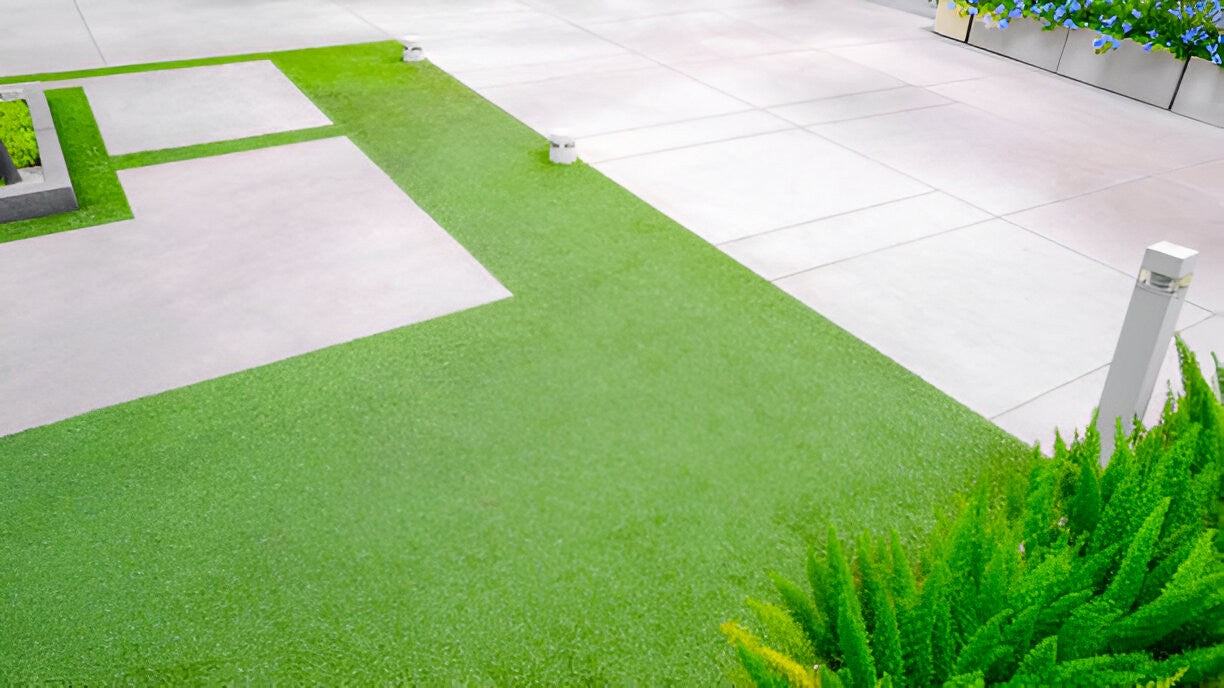
Laying artificial turf on concrete can completely change the feel of a patio or balcony. These spaces often appear plain or industrial, but turf introduces warmth and colour, making them more inviting. Around pools, the non-slip surface reduces the risk of falls and provides a comfortable area to walk barefoot.
This versatility makes it suitable for both small and large projects. A compact balcony can become a green retreat, while a large entertainment area can be upgraded into a welcoming, family-friendly space without expensive structural changes.
Longevity Compared to Natural Grass
When maintained correctly, high-quality artificial grass can last well over a decade, even in high-use settings. The synthetic fibres are designed to withstand foot traffic, UV exposure, and rain without breaking down quickly. On a concrete base, there is no soil erosion, weed growth, or muddy patches to deal with, which significantly extends its lifespan.
Choosing a product with good drainage and strong backing will ensure the installation performs for many years. While the upfront cost can be higher than laying turf on soil, the reduced maintenance and longer lifespan often balance out the investment over time.
Preparing the Concrete Surface for Installation
Cleaning and Clearing the Area
Before starting the installation, the concrete surface needs to be thoroughly cleaned. This includes sweeping away dirt, leaves, and debris, as well as removing any grease or oil stains that could affect adhesive bonding. Pressure washing is an effective method for achieving a clean base.
A clean surface ensures the turf adheres evenly, preventing gaps and lifting over time. Skipping this step can result in poor adhesion, which will shorten the turf’s life and compromise the overall look.
Checking for Cracks and Uneven Spots
Concrete surfaces are rarely perfect. Cracks, holes, or raised sections can cause visible lumps or weak spots in the finished turf. These imperfections should be repaired before installation begins. Small cracks can be filled with a suitable concrete filler, while larger structural issues may require professional attention.
Level surfaces create a smoother, more natural-looking finish, and they help avoid trip hazards. Even small uneven spots can cause adhesive to fail, so extra time spent levelling pays off in the long run.
Ensuring Proper Drainage
Artificial turf laid on concrete must have adequate drainage to prevent water pooling, which can cause mould or damage over time. If the surface lacks natural run-off, drainage holes can be drilled to improve water flow. In larger areas, a shockpad underlay with built-in drainage channels can help water move away from the surface.
Good drainage not only protects the turf but also makes the area safer to use during wet conditions. This is especially important in pool areas or regions with frequent rainfall.
Tools and Materials Needed
Essential Equipment for the Job
Installing artificial turf on concrete requires the right tools to ensure the process is smooth and the result professional. A sharp utility knife is necessary for cutting turf to size, and it’s worth having spare blades to keep cuts clean. For best results, consider sourcing your materials or advice from a trusted [Artificial Turf Company UK]. A stiff broom or power brush helps to position fibres upright once the turf is laid, giving it a natural appearance.
A measuring tape is essential for accuracy, especially in irregular spaces. Other useful tools include a chalk line for marking cuts, a roller to press down the turf for adhesion, and gloves to protect hands during installation. For larger spaces, a knee kicker or carpet stretcher can make the job easier by ensuring the turf is pulled tight before securing.
Choosing the Right Adhesive
The adhesive chosen has a direct impact on how well the turf bonds to the concrete. Outdoor-grade adhesives designed for artificial grass will provide strong, weather-resistant bonds. These adhesives are often applied using a notched trowel for even distribution, ensuring the turf sticks securely across the surface.
For smaller areas or temporary installations, double-sided turf tape may be suitable. However, for long-term use, a two-part polyurethane adhesive offers the best durability. In colder climates, choosing a product that remains flexible is important, as rigid adhesives can crack over time.
Selecting Quality Artificial Turf
Not all turf is created equal, and investing in a high-quality product can save time and money in the long run. When deciding how to install artificial grass, consider the pile height, density, and fibre softness. For concrete installations, a medium pile height of around 25–35mm provides a comfortable surface while being easy to maintain.
Backing quality is equally important, as a strong latex or polyurethane backing will prevent stretching and protect against wear. Some turf also comes with UV protection, ensuring the colour stays vibrant even in direct sunlight. Choosing a reputable supplier helps ensure consistent quality and long-lasting performance.
Step-by-Step Guide on How to Lay Artificial Turf on Concrete

Measuring and Cutting the Turf
Begin by measuring the entire surface area where the turf will be laid. It is better to measure twice and cut once, as mistakes can be costly. Lay the turf out over the space to check coverage before making any cuts. Use a sharp utility knife to cut from the underside, following the stitch lines to maintain straight edges.
It’s best to leave a small overhang at the edges during cutting, which can be trimmed once the turf is secured. This avoids gaps along borders and ensures a neat finish.
Positioning and Aligning the Rolls
Once the turf is cut to size, position the rolls on the concrete so the pile runs in the same direction. This creates a uniform appearance and avoids visual seams. Allow the turf to rest in place for a few hours before securing it, as this helps it settle and reduces creasing.
In larger areas, start from one side and work across, ensuring each roll aligns perfectly with the next. Poor alignment is one of the most visible mistakes in turf installation, so taking extra time here is worth the effort.
Securing the Turf with Adhesive
Fold back one edge of the turf and apply adhesive directly to the concrete using a notched trowel. Press the turf into place and work across in sections to maintain control. Rolling the turf after securing helps ensure strong contact between the adhesive and backing.
Avoid spreading adhesive too far ahead, as it can start to cure before the turf is positioned. For high-traffic areas, applying adhesive to the entire surface rather than just the edges improves stability.
Joining Seams for a Smooth Finish
Where multiple rolls meet, seam tape and adhesive should be used to join them. Place the tape adhesive side up beneath the edges, apply adhesive to the tape, then press the turf edges together. The goal is to create an invisible join, so avoid overlapping fibres.
A seam roller can help blend the fibres at the join, giving the appearance of one continuous piece. Properly joined seams not only look better but also prevent edges from lifting over time.
Adding Sand Infill for Stability
While optional on concrete, sand infill can improve stability, keep fibres upright, and reduce static. Silica sand is the most commonly used type, as it is clean, non-absorbent, and safe for pets. Spread the sand evenly using a drop spreader, then brush it into the fibres with a stiff broom.
The correct amount of infill varies by turf type, but overfilling should be avoided as it can compact the fibres. A light top-up every year or two keeps the turf performing at its best.
Tips for a Professional Finish
Avoiding Wrinkles and Bubbles
Wrinkles and bubbles are common problems when laying artificial turf on concrete, but they can be avoided with careful preparation. Allowing the turf to rest flat before securing gives it time to relax from the roll, reducing tension. Installing in warm, dry weather also helps, as the backing becomes more pliable and easier to work with.
When applying adhesive, working in small, manageable sections ensures the turf can be pressed down evenly. Using a roller to push out any trapped air during installation prevents raised spots from forming. Any minor bubbles that do appear after installation can usually be fixed by lifting the affected section and reapplying adhesive.
Creating Neat Edges and Borders
A tidy edge makes all the difference to the overall appearance. Edges should be trimmed after the turf is secured, cutting from the underside for precision. In garden areas, edging strips can be installed to hold the turf in place, while around patios and balconies, the turf can be bonded directly to the boundary.
Where turf meets a wall, a tight fit helps prevent debris build-up, while around features such as posts or drains, careful cutting and adhesive application keep the finish neat. Bordering the area with paving stones or decorative edging can add an attractive frame while protecting the turf from wear at the edges.
Preventing Wear in High-Traffic Areas
High-traffic spots such as doorways, poolside paths, and seating areas can experience extra wear. Choosing a denser turf with strong backing for these sections will improve resilience. Adding extra adhesive in these areas helps prevent movement, while an occasional brush keeps fibres upright.
In spaces where heavy furniture is placed on the turf, using protective pads under legs can prevent flattening. Regular maintenance checks allow any minor issues to be fixed before they worsen, ensuring the surface stays looking fresh for years.

Maintenance After Installation
Brushing and Cleaning the Surface
Artificial turf requires very little upkeep, but a regular brushing routine helps maintain its appearance. A stiff broom or power brush keeps fibres upright and removes leaves, dust, and dirt. For larger installations, a garden vacuum can make the job easier.
Cleaning should be done in the same direction as the pile to avoid disrupting the alignment. Brushing also prevents compaction, helping the turf remain soft and springy underfoot.
Managing Stains and Spills
Spills should be cleaned promptly to avoid staining. Most can be removed with warm, soapy water and a cloth. For stubborn marks, a mild detergent can be used, though abrasive cleaners should be avoided as they can damage fibres.
If the area is used by pets, regular rinsing with water helps keep the surface fresh. Specialist artificial grass cleaners are available for odour control and hygiene.
Seasonal Care for Long-Term Durability
Artificial turf performs well year-round, but a few seasonal checks will help it last even longer. In autumn, removing fallen leaves prevents moisture build-up. During winter, ice and snow should be allowed to melt naturally rather than being chipped away, which can damage fibres.
In summer, a quick brush before use restores the pile after periods of inactivity, keeping the surface comfortable and visually appealing.
Budget-Friendly Options for Every Project
When Cheap Artificial Grass Is a Smart Choice
For those working within a tight budget, opting for cheap artificial grass can still deliver a visually pleasing and functional surface. Lower-cost options are particularly suitable for smaller areas such as balconies, decorative corners, or spaces with lighter foot traffic. While the pile height and density may be less than premium versions, many budget ranges still offer UV resistance and decent durability.
Pairing affordable turf with good installation practices ensures it performs well and looks attractive. It’s better to invest in correct preparation and quality adhesive while choosing a mid-range grass than to overspend on turf and cut corners elsewhere.
Balancing Cost and Quality
In high-use or family-friendly areas, a balance between cost and quality is often the most practical route. Premium turf may have a higher initial price, but its longer lifespan and reduced maintenance needs can offer better value over time.
When comparing products, consider not just the purchase cost but also expected durability, fibre softness, and backing strength. Requesting samples before buying allows for direct comparison and helps in choosing a grass type suited to the specific project.
Common Mistakes to Avoid
Skipping Surface Preparation
Neglecting to clean, repair, and level the concrete before installation is one of the most common and costly errors. Dirt or debris can prevent adhesive from bonding properly, while cracks and uneven spots can cause bumps and trip hazards. Investing time in preparation creates a better-looking, longer-lasting result.
Using the Wrong Adhesive
Choosing an unsuitable adhesive can lead to sections lifting or shifting. Indoor adhesives are not designed to withstand rain and temperature changes, so always select a product specifically intended for outdoor artificial turf. The wrong adhesive not only shortens the turf’s lifespan but can also be more difficult to replace later.
Ignoring Drainage Requirements
Failing to ensure adequate drainage can result in standing water, which leads to mould and odour problems. On solid concrete surfaces, water needs a route to escape, either through drilled drainage holes or a specialist underlay. Without this, even the highest quality turf will suffer over time.
Final Word
Knowing how to lay artificial turf on concrete properly can transform even the most tired patio, balcony, or courtyard into a vibrant, low-maintenance space. With careful preparation, the right materials, and attention to detail, the finished result will not only look great but also last for many years. For those seeking an easy, attractive upgrade, whether using premium products or cheap artificial grass, a well-installed turf surface can be a valuable addition to any property.